• Texas Real Estate Commission Consumer Protection Notice
  • Texas Real Estate Information About Brokerage Services

Navy Fellas Realty Group

Real Estate, Residential sales and purchase

  • Home
  • About Us
    • About James
    • About Ashley
    • About Our Team
    • Accessibility Statement
  • Property Search
  • Resources
    • Home Buyer Tips
    • Home Seller Tips
  • Video Walkthroughs
    • Saratoga Homes (Plantation Lakes -Katy, Tx.)
    • David Weekly Home (Towne Lake)
    • Taylor Morrison Home (Alder Trails)
    • Ashton Woods (Towne Lake)
  • Blog
  • Contact

Let’s Talk Basements: How to Finish Your Basement so It Adds Value to Your Home

November 23, 2016 by James Scott

Let's Talk Basements: How to Finish Your Basement so It Adds Value to Your HomeAre you on the hunt for home renovations that will boost usability and value? Look no further than that unfinished basement. In this article, we’ll show you how to turn that dusty cave into an amazing new living space.
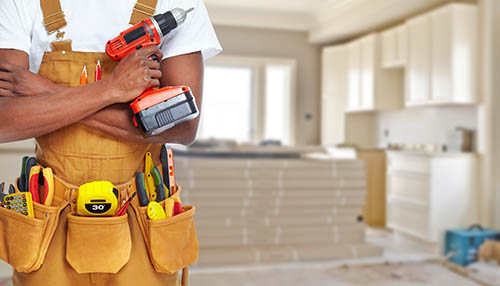
Note: finishing a basement isn’t the easiest job. For most basements, it’s a lot more than a weekend do-it-yourself project. If you’re not comfortable with construction be sure to enlist the help of a professional.

Step 1: Plan Everything Out

The first step is to plan out how you’re going to use the space. Are you going to make an office? A full suite? Is there any plumbing or wiring involved? Will you need to create full walls? Map out how you plan to use the available space so you have an idea of what you’ll need.

Step 2: Measure And Deal With The Floor

Once you figure out how you’ll use the space, you’ll need to measure everything out. Height can be an issue — especially in basements not designed as a living space. You can solve height problems by digging out the concrete slab. Once you get down deep enough, you pour a new slab.

Step 3: Frame Everything In

Is the basement at a good height? Next you’ll need to start framing everything in. Depending on how you have your walls mapped out, this might take a while. You may also need permits or to enlist licensed tradespeople, such as an electrician. If you’re just framing in a single room to add walls, it will be easier.

Step 4: Insulate And Install The Walls

After the framing process, you’ll insulate everything before installing the walls. Adding insulation can drive energy and heating costs down by a lot. So much so that in colder areas of the country, new homes must have insulated basements. After the insulation is in place, you’ll install the drywall and ready the walls for painting.

Step 5: Paint, Carpet And Finish Up

The final step is to get everything painted and finished. If you chose to go with a carpeted floor, you’ll want to save this for last. Once the painting is complete, install the carpets, baseboard and trim. Touch up any final areas and you’re all set.

Finishing your basement into a usable space is an excellent way to add value to your home. To learn more about building your home’s equity, give us a call.

Filed Under: Around The Home Tagged With: Around the Home, Homeowner Tips, Upgrades and Renovations

Reduce Your Home’s Carbon Footprint With These Energy-Saving Tips

November 16, 2016 by James Scott

Reduce Your Home's Carbon Footprint With These Energy-Saving TipsDo you believe that humans are changing the climate? As of today, the debate over carbon dioxide and climate change continues to rage. But regardless of your political standpoint, there’s always a case for reducing electricity use. Because who doesn’t like saving money, right?
Let’s explore a few ways that you can save energy while reducing your home’s carbon footprint.

Leverage The Power Of Automation

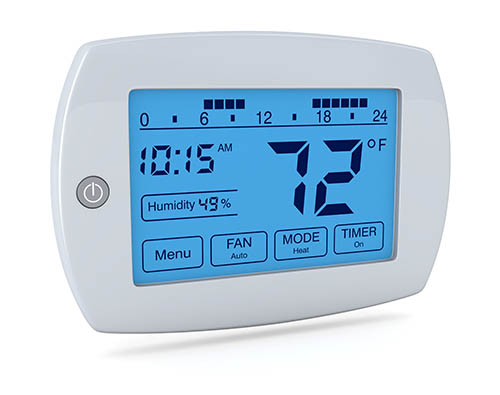
The technology behind home automation is improving at an amazing rate. Thermostats from companies like Nest make home heating and cooling simple. They learn from your use to automatically set temperatures up and down as needed. Going to be home late from work? No problem — you can use your smartphone to ensure your heat doesn’t come on until later.

Wash Cold, Hang Dry

You might not be aware of this, but cold water washing makes sense. Most washing machines and detergents are just as efficient with cold water as hot. So it makes sense to switch to washing in cold, especially if you have a newer washing machine.

To cut back even more, hang your clothes to dry instead of using the dryer. The technology behind clothes dryers hasn’t improved much over time. They still rely on warm air, forced ventilation and spinning around. All of which use a lot of energy.

Note: if you have to use your dryer, add a clean, dry towel to each load. Adding a towel will help your clothes to dry faster, thus saving you both time and money.

Modernize Your Home Lighting

Have you made the switch to power-efficient LED light bulbs yet? This one change can save an immense amount of electricity depending on the size of your home. And you can take things a step further by automating your home lighting as well. Systems from companies like Philips allow you to turn lights up, down and off as needed. You can also control these from your smartphone.

Kill Off The Vampires

Finally, watch for appliances and accessories that draw power when they’re not in use. ‘Electricity vampires’ like smartphone chargers, laptops and televisions can draw power 24/7. It’s a bit of a pain to have to unplug everything all the time. Instead, consider having these appliances plugged in to power bars. When you’re finished using them, you can switch the power bar off and go on with your day.

The above are just a few ways that you can reduce your home’s carbon footprint. If you’re interested in upgrading to a power-smart home, talk to your local real estate agent today. We’ll be happy to recommend local homes that are high-value and low-carbon.

Filed Under: Around The Home Tagged With: Around the Home, Homeowner Tips, Upgrades and Renovations

7 Easy, Inexpensive Home Storage Hacks That Will Free Up Your Space

November 15, 2016 by James Scott

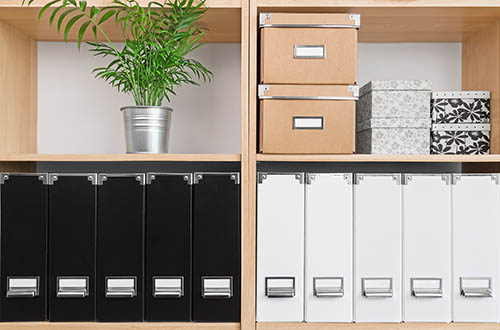
7 Easy, Inexpensive Home Storage Hacks That Will Free Up Your SpaceEven small spaces can feel spacious when the art of storage is mastered. Here are 7 inexpensive storage hacks to free up space in your home.

1. Racks On Racks On Racks

It’s often the first mess you see when walking into someone’s home a clutter of shoes sprawled out by the entrance. Take care of this mess with a shoe rack, which will only take up a few feet of space but allow you to store numerous pairs of kicks.

2. Fold & Hang

Not your clothes, your chairs! If you don’t use chairs often or rarely eat at the table, consider buying folding chairs instead as they can easily be put away when not in use. Attach a few hooks to a nondescript area of your home and hang the chairs to store them.

3. Slide Into An Island

Need more counter space but can’t sacrifice your kitchen table? Well now you can have both (without renovating!). Install a small island that has a slide-in table: you can slide out the table during meals and slide it back in when finished. Perfect when paired with folding chairs.

4. Make The Most Of Your Cupboards

Install small storage solutions inside of your cupboards to make the most of their space. Hooks can hang mugs from the tops of shelves, and towel racks placed on the inside of a cupboard door can fit pot lids. For a large cupboard, consider a hanging shoe rack for compartmentalized storage space from top to bottom.

5. Multi-Purpose Furniture

When trying to maximize space, choose furniture that also offers storage, such as a bed frame with pullout drawers underneath it, or an ottoman that opens up to store remotes, books, or toys. There are countless pieces designed for small spaces, so find ones that meet your own unique needs.

6. Build Me Up Buttercup

When floor space is limited, you have no choice but to build upwards. Shelves allow you to make the most of vertical space, and can fit into almost any area. Corner shelves can help you take advantage of otherwise dead space, and tall shelving units can act as a room divider which is perfect for a studio. If you want to create a more open concept, choose wall-mounted shelves as they have minimal design impact.

7. Hang It Up

Along with every door comes a fantastic storage opportunity! Choose a door-mounted hanging storage system to keep clothes, robes, towels, or shoes off of the floor. Feel free to be creative you can use them to store whatever you like.

Want more tips on small space living? Contact your trusted real estate professional today.

Filed Under: Around The Home Tagged With: Around the Home, Homeowner Tips, Upgrades and Renovations

5 Futuristic, Connected Home Upgrades That You Can Install This Fall

October 28, 2016 by James Scott

5 Futuristic, Connected Home Upgrades That You Can Install This FallThe future is now! You may know that there are already many smart (Internet-connected) appliances and items that you can use to update your home for the connected age. But for your reading pleasure, here are five of them already on the market.

Energy Efficiency: The Smart Thermostat

One of the first smart home upgrades to make it big on the market is the smart thermostat, specifically the Nest Learning Thermostat. Connected to your heating system, and to your phone through Wi-Fi, this device ‘learns’ your energy use habits so it can adjust to them. It saves you money by tailoring its output to your usage, which means it is kinder on the planet as well. Smart tech for the win-win.

Intelligent Alarms: Smart Smoke Detectors

In the same vein is the smart smoke and carbon monoxide detector technology. These alarm systems assess the danger and speak to you. They report on multiple details, including what kind of danger you’re facing (fire or carbon monoxide poisoning), where it is exactly in your home, and whether it constitutes an immediate risk to you.

Turn It On!: Smart Light Bulb

A-ha! The intelligence continues. There are smart light bulbs now like the Philips’ Hue Connected Bulb which speak through your Wi-Fi. This light can be controlled remotely through your phone or computer, where you can change its color and adjust the brightness without ever touching the bulb itself.

Baby Care: The Smart Onesie

You know those moments you need to yourself, when you step out of your baby’s room to let them sleep? Well, there’s now a device to help keep track of them even then. The Mimo Baby Shirt is a smart onesie. Its organic cotton is woven with sensors that monitor elements like your child’s temperature or sleep pattern and streams that info to your device through your home’s Wi-Fi. It can be fitted with a microphone, again linked to your phone and it’s machine-washable!

The Next Mouthful: The Smart Fork

Last but not least, there’s the HapiFork. This smart utensil monitors your eating habits how fast you’re eating, the time between meals, how many bites it takes to finish the meal. These tidbits can be uploaded to your laptop or phone, and can help you track and change how you eat.

As technology continues to progress, our homes are becoming smarter and smarter. Keep up with the tech by staying abreast of new developments starting with these five. Oh, and one last smart thing? Reaching out to your local real estate agent for more information, recommendations or just to chat about the future.

Filed Under: Around The Home Tagged With: Around the Home, Real Estate Tips, Upgrades and Renovations

Buying a Solar-Powered Home? Watch Out for These Symptoms of Future Problems

October 11, 2016 by James Scott

Buying a Solar-Powered Home? Watch Out for These Symptoms of Future ProblemsSolar-powered homes are becoming more commonplace, and are an excellent step in the right ecological direction. That said, there are some aspects to consider if you’re thinking about investing in solar energy. Read on for some salient points about living by the sun.

The Sun And The Economy

As solar power has grown in popularity, the government has introduced incentives to help homeowners combat the once-high costs of purchasing and installing solar panels. And companies are springing up to rent you panels and cover the cost of installation. This means that your initial costs are smaller, but also that those third party companies reap the government incentives and may not always maintain strong relationships between you and your utility company.

The Sun And Your Roof

Roofs are the primary locations for solar panels, particularly on homes. Ensure that your roof has enough strength for the added weight of the equipment, and enough space for the proper placement (away from the edges, for example). The equipment comes with a lifetime guarantee so if the roof it’s on is already old, consider updating it before installation (which is an extra but necessary cost).

The Sun And Your Surroundings

A solar-powered home is all about location, location, location. Watch for tall and shady trees, or for high buildings that will shadow your panels and decrease or prevent their output. Look forward, too are there any plans for development in your neighborhood that would introduce such impediments in the future?

The Sun And Cloudy Days

The most obvious hiccup with solar power is that bane of a sunny existence: cloudy days. Location has influence here too: the climate of your area will determine how many panels you’ll need, where you’ll need to place them and how much energy you’ll be able to glean in each season. There are batteries you can purchase for collecting and storing solar energy but they’re still an expensive option. And solar power is still somewhat unattractive in the global economy because of how variable it is. Fossil fuels are more dependable, and therefore more marketable, than an energy source so tied to the weather although that looks to change if solar energy continues its rise in popularity with the masses.

All things considered, there is a deep and growing draw to solar-powered homes, but don’t enter into anything without looking at all sides of the equation. If you have questions, or want to know more about how solar energy works in your neighborhood, contact your local real estate agent.

Filed Under: Home Buyer Tips Tagged With: Buying A Home, Home Buyer Tips, Upgrades and Renovations

Bedroom Upgrades: How to Decide Between Hardwood and Carpet for Your Bedrooms

October 4, 2016 by James Scott

Bedroom Upgrades: How to Decide Between Hardwood and Carpet for Your BedroomsThe floor of your bedroom is important it’s the first thing you touch in the morning, and the last before you go to sleep. Not to mention all the other life moments that go on in there. So take time to consider what you want your bedroom floor to be made of and read on for pros and cons of carpeting and hardwood floors.

The Noise Factor

One of the biggest elements to consider is how sound will carry. Carpet is a very quiet medium, perfect for those bedrooms on higher floors, or in houses that want to keep a quiet profile. Hardwood creaks, and all movements can be heard from walking to a child playing, even to the acoustics of a TV or laptop.

Keeping It Clean

Carpets are hard to keep clean. Dirt, pollen, hair, food and other particles get ground into the fabric, especially if it’s a high-traffic area, and it can be expensive to get them out. Hardwood is easy to tidy and even stains can be refinished without too much cost or effort. On the other hand, carpets need only be vacuumed weekly, whereas a hardwood floor should be swept every other day.

The Life Span Of Your Floor

With careful maintenance, carpets can last for many years but barring anything unforeseen, hardwood floors last forever. They also never go out of style, and offer their rooms a sense of prestige. Carpets need replacing and the patterns can’t be changed with the ease that hardwood floors can be refinished or refurbished with area rugs.

The Cost Of It All

In initial costs, carpets are largely cheaper, although they cost more to maintain because they need to be replaced more often. Hardwood floors take a big initial payment, but because they are more durable the costs even out, in the end. Environmentally speaking, hardwood is often more sustainable (as long as it comes from an ecologically-sensitive company), but there are recycled options for carpeting too.

What Goes On In There

Consider what kind of life will be lived in the bedroom in question. Will it be a kid’s room, where the padding of carpet might be safer? Is it meant for guests, where the beauty of hardwood could make a strong first impression? Does the occupant have allergies, so that hardwood (which doesn’t gather allergens like carpet fabric) is a better choice?

Consider everything when making your decision. Remember, in the end, both hardwood and carpet have pros and cons. For a second opinion, or advice on what works in your neighborhood, talk to your local real estate agent.

Filed Under: Home Seller Tips Tagged With: Home Seller Tips, Selling A Home, Upgrades and Renovations

Don’t Even Think about Selling Your Apartment or Condo Without These Key Renovations

September 8, 2016 by James Scott

Don't Even Think about Selling Your Apartment or Condo Without These Key RenovationsFail to complete these renovations before selling your condo and you may be missing out on huge profit gain! Don’t sell yourself short, tackle these reno projects before your home hits the market to maximize offers.

#1: Is It Time To Paint?

Painting is one of the most cost effective ways to make a property look newer, bigger, and brighter. Scuff marks and scratches are one of the most common types of wear-and-tear, but they’re also a huge turn-off to buyers, which makes this easy renovation is a no-brainer. Choose paint colors that are neutral to ensure that they’re adaptable to the wide variety of interior design preferences that your potential buyers will have.

#2: Let There Be Light(ing)!

Old light fixtures can not only bring down the aesthetic appeal of your condo, they can also give it a gloomy vibe. Adding new light fixtures to your home will brighten the space and provide it with more vibrant energy while also increasing the modernity of its design. Now that’s a bright idea!

#3: How Is Your Flooring?

Flooring is another design element that can easily make an old unit look more modern, especially if your condo is carpeted. By replacing the floors you can also avoid the possibility of a buyer trying to deduct the cost of floor replacement from your sale price, which would most likely outweigh the cost of doing your own reno in advance.

#4: Spruce Up The Kitchen With New Counters

Changing kitchen countertops is one of the effective ways to spruce up an outdated kitchen. Since countertops are so large the eye is drawn to them immediately, making them a key design factor. Many modern buyers prefer high quality stone such as granite or marble, though there are many stylish options to choose from if visual appeal is what you’re after. Add new countertops to give your condo that “WOW” factor and you’ll instantly tack on extra value to your property.

#5: Don’t Forget Your Balcony!

Balconies are often overlooked when it comes to condo showings, so if you choose to pay attention to this significant detail you’ll not only stand out from the competition but will also showcase an important selling feature of your home. Dress the balcony to show its functionality: does it fit a BBQ, table and chairs, lounge chair, planter? Adding some furniture will show the possible uses of the space, making it more valuable to potential buyers.

Ready for a successful condo sale? Contact your trusted real estate professional today for further advice.

Filed Under: Home Seller Tips Tagged With: Home Seller Tips, Selling A Home, Upgrades and Renovations

Electronic Gopher Repellers and 4 Other Home Gizmos You Never Thought You Needed

August 25, 2016 by James Scott

Electronic Gopher Repellers and 4 Other Home Gizmos You Never Thought You NeededAs a homeowner, thinking outside the box, gadget-wise, can lead you to gizmos that solve your problems – even ones you didn’t know you had in more humane, sustainable, energy-efficient ways than ever before. Read on to find out about five such inventions.

It’s Humane!: Solar-Powered Gopher Repellent

If you ever have a problem with rodents like gophers, moles, voles or shrews intruding on your lawn, look no further. This humane repellent doesn’t hurt anyone (people or animals), it simply emits a high-pitched sound at regular intervals to disrupt the animals’ sleeping patterns. It discourages them from moving in by making your lawn inhospitable but without using traps or poison. The sound is too high for humans to hear it, and only travels underground so dogs aren’t disturbed, either.

It’s Tasty!: Outdoor Wine Glass Holders

They seem simple, but sometimes the most obvious things are the hardest to recognize. Like outdoor wine or champagne glass holders removing the need to balance a full glass on uneven ground. Next time you’re on a picnic, take along these portable items, stick them in the grass (or the sand, if you’re at a beach) and hang your stemmed glass on the hook.

It’s Easy!: One Touch Jar Opener

Who hasn’t struggled with a jar opener for the pasta sauce while the noodles boil over and the onions burn? For any cook that doesn’t have a sous-chef handy, don’t worry there’s now a one-touch jar opener for just that occasion. Conveniently sized and battery-operated, these little guys adjust to any jar size and have padded edges to protect the jars so you can reuse them.

It’s Handy!: iPad Fridge Mount

Increasingly, people these days are cooking with recipes from the Internet. With an iPad Fridge Mount, you don’t need to copy out the recipes, print them or worry about your device getting splashed or hit with dinner. The mount is easy to install no tools needed and easy to remove, so the iPad is as portable as ever. The mount can also go on walls or doors.

It’s Smart!: Automated Watering Controller

Unlike the other items on this list, which ranged from $10 to $30, the Blossom Smart Watering Controller sells on Amazon for just under $400. But it saves money, and conserves water, by monitoring the weather (so it can adjust its lawn/garden watering schedule for wetter or dryer days), and you control it through your smartphone. No new wiring, sprinklers or valves are needed.

If you need more info or want suggestions on neat home gizmos that work well in your neighborhood, reach out to your local real estate agent.

Filed Under: Around The Home Tagged With: Around the Home, Real Estate Tips, Upgrades and Renovations

Thinking about a ‘Fixer Upper’? Understanding the Balance Between Purchase and Reno Costs

August 11, 2016 by James Scott

Thinking about a 'Fixer Upper'? Understanding the Balance Between Purchase and Reno CostsFixer uppers can come with huge price benefits and opportunity, as well as problems. Make sure you understand what you’re getting yourself into before you purchase a home that needs significant restoration.

Carefully Calculate

Do the math very carefully before jumping in. Add up the expected renovation costs based on a thorough evaluation of the property. As some of the expected costs will lie within a grey area, it is important that you base your estimation on the higher end of the price range. Be sure to account for all materials and labor.

Once you have calculated your expected renovation costs, subtract this number from the home’s projected post-renovation market value. It is important that you base this projection on comparable listings in the same neighborhood. Consulting a real estate professional can offer very valuable assistance with this step.

To be conservative, deduct at least another 10 percent for any unforeseen costs, mistakes, or issues that arise. That final number should be the highest offer you make on the property.

Work With The Right Team

When looking for a fixer upper that is a sound investment, make sure that you have a solid team of professionals to work with. Choose a real estate agent who is familiar with the area and type of property that you are interested in, and make sure that all laborers you hire are not only competent to deal with the problems that you’ll face during renos, but who won’t cut corners. Aesthetically appealing housing don’t always pass inspections – it’s important to make sure that the property is fit for sale or it may never close at your asking price.

Aesthetic Problems Are The Best Problems

If you’ve managed to find a home that’s in great condition but is visually unappealing, you may have found yourself an excellent fixer upper. Ugly carpet, old appliances, and tacky wallpaper are easy fixes that won’t eat up much of your budget or your time.

Asbestos, leaky water lines, a cracked foundation, or a rotted frame are examples of more significant issues that will require the help of a professional. Be wary when investing in a property that has one or several of these problems, as they are the kind of issues that snowball into larger costs and a longer timeline for repairs.

Ready to find a great fixer upper and tackle it as your next investment? Move forward with the help of your trusted real estate professional today.

Filed Under: Home Buyer Tips Tagged With: Buying A Home, Home Buyer Tips, Upgrades and Renovations

Need a DIY Summer Project? How to Paint Your Home’s Exterior in a Weekend or Two

August 10, 2016 by James Scott

Need a DIY Summer Project? How to Paint Your Home's Exterior in a Weekend or TwoIf you want something hands-on to do this summer, look no further than the outside of your house. There are many reasons to refresh the paint job on your house, including increased protection against weathering, and increased curb appeal. Whatever your reason, read on to learn just what you’ll need, and need to do, to paint your home’s exterior.

What You’ll Need: Materials, Tools, Protection

A DIY paint job is easily doable, and costs only as much as the materials, tools and protection you need. Those materials include the paint itself, the primer and the caulking (to seal cracks and joints). For tools, look for paintbrushes and rollers, sanders, and scrapers. You’ll also need drop cloths (to protect your lawn/garden), masks/respirators (to protect yourself), and a HEPA vacuum/suit if you’re stripping lead-based paint.

What You’ll Do: Step One

Essentially, house-painting boils down to three steps. First, prep the surface. You’ll need to wash the house, scrape loose paint off and sand it smooth to make it an ideal surface to which the new paint can adhere. Note, if your house was built before 1978, test for lead-based paint (which will just require a little more protection while you’re scraping it off). Lead-testing kits can be purchased online.

What You’ll Do: Step Two

Next, patch and prime. Fill in smaller imperfections with something like epoxy. Bigger gaps and joints will need caulking but do this only after the primer is applied. Take this patching time to fix any rot or potential rot problems signaled by improper water drainage. Then prime the whole exterior this seals the wood and makes it even easier for paint to adhere to the walls.

What You’ll Do: Step Three

Finally, the paint. Water-based latex (or acrylic) paint is more flexible, easier to clean and more environmentally friendly than oil-based paints. Read the paint can they contain tips and instructions on using the paint that can come in handy. With DIY, brushes and rollers are better to use than a paint-sprayer, which can be hard to control. Three tips: always start at the top of the house and paint down, it’s always better to do two coats, and stay in the shade while you’re working painting in direct sunlight causes the paint to dry too fast and flake.

What You’ll Do After: How To Maintain An Exterior

Once your exterior has dried, keep it looking fresh with consistent caulking, touch ups for peeling paint and removing mold and mildew whenever you spot it.

For more tips or advice on improving your home’s value in your neighborhood, talk to your local real estate agent.

Filed Under: Around The Home Tagged With: Around the Home, Painting, Upgrades and Renovations

  • « Previous Page
  • 1
  • …
  • 8
  • 9
  • 10
  • 11
  • 12
  • 13
  • Next Page »

Connect with Me!

SEARCH FOR HOMES 
What’s my home worth? 

Return to top of page

Copyright © 2025 Navy Fellas Realty Group. All rights reserved.   Log In